The RIGHT (Correct) Angle

Tēnā Koe, Reader!

Recently in maths, the year 8 has been focusing about the fascinating world of angles! We’re moving beyond simple measurements to truly understand their–the angles–properties and how to describe them accurately. The key to our success has been mastering the three-letter notation, like ∠ABC, which has allowed us to comprehend communicate our geometric findings. That brings me to my question.. what are you learning about in Maths? I’d be intrigued to know if I’ve learnt about something similar or not!

What’s The Deal With ∠ABC?

It all comes down to being super clear. See, when you write ∠ABC, you’re telling everyone exactly which angle you mean. The letter in the middle, B, is the pointy bit of the angle—what we call the vertex. The two letters on the ends, A and C, just show you the two lines that make the angle. It’s a great way to avoid confusion when you’ve got a bunch of lines all crossing each other.

With this new way of talking about angles, we, the Year 8’s, have become experts at spotting all the different kinds! Like:
  • Acute angles: These are the “sharp” ones, less than 90°.
  • Obtuse angles: Think of these as the “wide” angles, bigger than 90°.
  • Right angles: The classic 90° corner. Now they know to look for that little square box to spot them (like the corner of a picture frame).
  • Reflex angles: These are the big angles, the ones that are more than 180°.

Vocab Wall

During class, the students learned some new words that are great shortcuts for describing different types of angles. For example, the word “supplementary” is a quick way to talk about two angles that add up to a straight line (180 degrees)! Instead of talking about the angles that add up to or into a straight angle. Another word I’ve learnt whilst studying was complementary! ”Complementary” ANGLES are a pair of angles that sum up to a right angle (90°). They can be visualized as two pieces that fit together to form a perfect L-shaped corner.
Alternate and corresponding angles
When two parallel lines are crossed by a transversal line, the relationships between alternate and corresponding angles become apparent.
For alternate angles, I ideally think that the key word is “opposite.”. They are on opposite sides of the transversal line that crosses through two parallel lines. When the lines are parallel, these angles are always equal to each other.
In regular life, “corresponding” means something that matches up with something else. Think of two houses that are built exactly the same on a street. The window on the top-left of one house corresponds to the window on the top-left of the other. That’s the best way I could visually explain the word.
So our two other new words I’ve learnt were:
  1. Alternate Angles &
  2. Corresponding Angles.

What we’ve learned isn’t just for tests. We see angles everywhere. The right angle of a building, the acute angle of a roof, or all the different angles in a cool drawing. It’s awesome to see people using this stuff to describe the world around them. I think my understanding is great because I understood most of what I was tasked to do. We did a great job, and it’s been fun seeing us get so into it!

Thanks for reading! Comment your thoughts on this post down below
– For the original blog – Please check out Trinity’s blog

Sir Edmund Hillary – The Man Who Conquered Everest and Won Hearts

Kia Ora Reader how is your day going? Join me on an adventure to get to know our namesake, Sir Ed.

Sir Edmund Hillary

Sir Edmund Hillary wasn’t just the first man to climb the tallest mountain in the world, he was a real New Zealand hero. He was brave but also humble and kind. In 1953, with his climbing partner Tenzing Norgay, he reached the top of Mount Everest. Lots of people thought it couldn’t be done, but he showed it was possible.

But the best thing about him wasn’t just climbing Everest. After that, he used his time to help people in Nepal. He helped build schools, hospitals, and even bridges so their lives could be better. He didn’t care about being famous, he cared about making a difference.

That’s why people remember him as more than a climber. He showed that Kiwis can be tough and determined, but also caring and helpful to others.

Video of life story  Everest’s First SIR EDMUND HILLARY · BIOGRAPHY 

Music Sir Edmund Hillary song

These are the links from my Sir Edmund Hillary DLO.

  • Bella-Rayne – For the original blog: Link

Engineering in Term 3

Kia ora, my name is TJ

Transporting Water

This week we got to learn more about engineering. We learnt about transporting water, and we also had to design and make an island that could survive tsunamis and rising sea levels.

For the first activity, we had two buckets. One had water and the other one didn’t. The empty bucket had a hole in it. The point of the activity was to take water to the cone and back to our team. First we got told what to do in the hall, then we chose our teams and took off our shoes, socks, and jackets. Then we went outside and lined up.

When the game started, me and my team picked up the bucket and ran to the cone and back. When we poured the water into the empty bucket, some of it came out from the hole, so one of us put a finger on the hole. We did that a couple of times, then a teammate told us the instructor said we only had to touch the bucket once and then one person could run. So we changed our plan. Everyone touched the bucket once, then one person ran.

After the round, the instructor checked how much water was left in each bucket. The team with the most water got an advantage for the next rounds. We did a few rounds, and I don’t know who had the most water, but that team won.


Safe Island

The next activity was to make an island that could survive tsunamis and rising sea levels. My team wanted to make a floating island. We used clay, Popsicle sticks, paper straws, and a piece of blue paper for the bottom.

For the island, we put Popsicle sticks on clay and broke some into smaller pieces to make houses and buildings. We made seawalls too, to protect from tsunamis. We used paper straws as chains to stop the island from drifting away. The chains were long enough so the island could rise when sea levels went up, but short enough so it didn’t float away.

We also made different buildings. Small sticks for houses, bigger sticks for taller buildings, and the tallest stick for a laboratory. The lab is for figuring out how to make the island better. There’s a control room for the rulers of the island. In the control room, there’s a security panel and two buttons. Both buttons have to be pressed by two people to release the chains if the sea gets too high.

  • TJ – original post link

Navigating the Shimmering Waters of Whanganui

Kia ora,

We have navigated our way through the shimmering waters of Whanganui. Exploring the dusty hue upon the West Coast of the North Island, where we came across the monstrous buildings of Rutherford Junior College.

We have found the whēnua of our Tuhi Mai Tuhi Atu whānau, Mātāmua. We are exploring what we have found in and around their school and what we notice. Come and explore more!

We noticed that Rutherford Junior College is right next to another campus called “Arahunga School”. Here’s our photo to help you learn more.

Click on the image to hear my audio.

We noticed they have a large field and 4 tennis courts. There are a lot of houses around it, and they have a car park and trees on the boundary. Here in Papakura, we have a marae only 500 m down the road where they hold community dinners and courses, and they have a medical centre for our community to go to.

We saw that there is a large river in Whanganui, and we have Koiwi Creek, which runs out to Paahurehure Inlet.

Our school is small, but their school looks big. We have several schools here in Papakura.

We look forward to learning more about our buddies.

Ngā mihi.

He Hononga Kupu: Mapping Our Tuhi Mai, Tuhi Atu Journey

This term we are navigating the journey of ‘Tuhi Mai, Tuhi Atu,’ where we are commenting on the blogs of students from schools around the country. We endeavour to learn more about the schools and their communities to see what connections we can make.

Take a look at our ‘Google Earth’ voyage as we learn more about each school:

  • We dock in to the wharf and tie off the mooring of  St Max at St Joseph School, Levin
  • Navigating back under our own power of Mātāmua at Rutherford Junior College, Whanganui

What an exciting voyage we are on! Keep up to date with our journey as we learn more about our ‘Blogging Buddies.’

Click Google Earth to explore each of the schools’ grounds and the surrounding area.

Links to our Tuhi Mai, Tuhi Atu team

(A) St Max -St Joseph School (Levin)

(B) Room 9 -Edmund Hillary School

(C) Mātāmua-Rutherford Junior College (Whanganui)

Engineering: Structural Integrity For A Bridge. ⚙️

Kia Ora, Reader.

As of right now, I’m writing this in the hall with no images nor videos of what we did yet, but we did just finish engineering, so I’ll tell you all about it. Starting at 9:30am, we were heading into the hall where we were greeted by Whaea Ruth. Where she presented engineering slides to us, after about a minute, we were told to be sorted into groups of four. After doing so, we were given a tin of Jenga, and told to make the tallest Jenga tower you could make. Exploiting the rules, people were using the actual tin, since it was never stated that using the tin was against the rules. Discovering this, most if not all the groups had used the tin, it was a fun activity to get us started in my opinion.

This is another group with their tower building.

The next instruction was to make bridges out of cardboard paper. When was I had something spark inside of me, a design with the exact same cardboard paper. It felt like Deja vu, having done the same thing before, but I had no idea when I’d done this. But I had got to work, telling my group to help me cut, tape, and put things together. It wasn’t finished but the product was good for it’s size, it may not be as good as the “Da Vinci” bridge, since there was only some tension holding it together, the rest being tape. But for the timeframe we were given, it was pretty bad, compared to others who had pillars, designs, inspiration. Our bridge came straight from the mind.

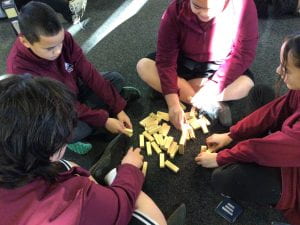
Overall, it was a cool engineering day, the Jenga, and the Bridges, in my opinion, the Bridges were the best, since it was pretty much a challenge between everyone, to see who could build the best bridge. It was fun seeing everyone work together to beat other people, I wouldn’t say our bridge was the best, but it was better than some.

You have reached the end of this blog post, thank you for reading. I’ll see you at the next blog.

25. Engineering Week 2: Building Bridges

Kia Ora

As of this day, we went to the hall and built bridges and designed them, but at first we watched videos on how they were controlled. Then we had to choose to be in a group of four, Next we looked at videos that presented bridges like the Bascule bridge in Whangarei that moves for boats, The next instruction Whaea Ruth gave was building the longest tower out of Jenga blocks without it falling , As a team of four we managed to make a tall building but we weren’t the tallest because we didn’t know you could also stack up the box containing the Jenga pieces.

After we finished that challenge Whaea Ruth gave us we were instructed to do the same thing but we had to the the pieces on an uneven terrain, Which means we had to stack up the pieces in a scrunched up cloth, It was hard and our tower kept falling down. In the end we didn’t make it work as it kept falling into pieces.

The last challenge we had to do was making a stable bridge out of cardboard, We were given scissors and the cardboard and 30 minutes too make the bridge, We made the bridge by ideas and no use of inspiration or reference, We ultimately built a steady bridge but we couldn’t build the entrance of the bridge with the limited time we were given.

Overall it was a fun learning experience that we had, Thank you for reading my blog.

Da Vinci Bridge -What?

Hello, This morning, we went to Engineering in the hall. When everyone arrived, there was excitement building inside of me as I saw a lot of poles and planks. In front of us was a group of engineers. After they introduced themselves and told us what we would be doing, we were sent to our activities in the lines that we were already in. For my group’s activity, we were doing the bridge that Leonardo da Vinci created. The aim of our bridge that we’re making is to build a sturdy bridge using chopsticks.

  • Posted by TJ

Bike Safety

Talofa lava, Reader!

Today we were given a task to make a DLO about Bike Safety. As you can see, there are two names on the work—mine and my friend’s—because we decided to work together. We thought it would be faster and easier since we both had different ideas about Bike Safety.

On the DLO, we wrote about why it is important to wear helmets and explained our 142 and ABC method for bikes and helmets. Our task was to write paragraphs about the different Bike Safety methods and explain why wearing a helmet is important.

Here is our DLO:

Thank you for reading my blog post and have a fantastic day!

  • Susana – Link for the original blog post

Civil Engi-nearly Collapsing

Hello, Reader! Lovely day’ innit. I hope you like my title, personally I found it funny because it actually relates to my experience building a Straw Tower! Crazy, right? Well it was chaotic.

For the next 6 weeks on Wednesday’s, we’ll be focusing on Engineering. This week on Wednesday, we found an interest in civil engineering—our topic this week of engineering. The three classes who took part in the engineering were; Room 10, 9 and 2. (Just the senior students) Then, all three classes were brought into the hall and were met with two civil engineers along with three construction engineers.

As our classes settle into four rows, one of the engineers introduces herself and shows us to each station with different things present on the tables our rows will be looking at. There was a station focusing on making paper towers, the one I did were straw towers, another station worked on a decent sized bridge, then the last station at the end of the hall were using bamboo to make a bridge Da Vinci style 🔥.

My row was brought to the straw tower station, met with five tables. There are supposed to be three people on each table but I’m assuming there were way too many people to split into three that’ll fit in five tables, so some groups had more than three— not mine though.

On the tables were straws, scissors and a limited amount of blue duct tape. Our goal was to make a tower sturdy enough to hold two ping pong balls 12 inches (30 cm) away from the table. We sat through watching a video talking about the challenge and there were rules; no taping the ping pong balls in ANY way and the tower has to be freestanding. Each table had limited straws as well, we had to use 20. My group made a pyramid, we used and taped straws to make a square for our tower to stand, then taped straws on each corner extending out. We gathered all four straws found on each corner to the middle and taped them to make a pyramid — then proceeded to cut in half and tape two other straws on each side, then for its other half to extend onto that half for the ping pong balls to sit on. Our tower wasn’t 30 cm tall, I’m pretty sure we were like… 8 cm off? That’s what I estimated.  In the end, we succeeded! We finished our objective and managed to hold two ping pong balls.

That’s all for today, thank you for reading! If you have any questions or liked anything about my post, inform me in the comments! Bye!